How To Add Drop Down Menu In Shopify
 How To Add Drop Down Menu In Shopify Blog Post
 Adding a drop-down menu to your Shopify store can be a bit intimidating, especially for first-time website owners. Fear no more — this guide is here to help you get the hang of the easy-to-use drop-down menu feature!
What is a Drop-Down Menu?
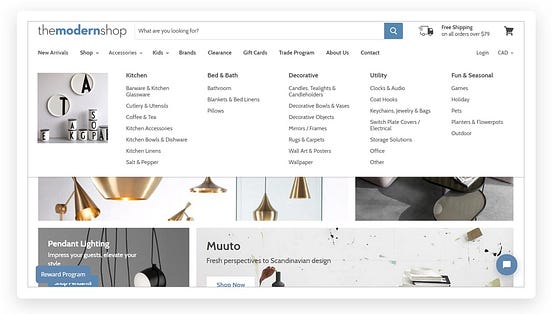
A drop-down menu is an interactive element on a webpage that allows site visitors to make choices from a list of options. Think of it as a list of items which can be selected by the user. Most drop-down menus contain multiple layers, which allow for further selection and exploration of the website. Drop-down menus give your customers the power of navigation, helping them find the product or service they are interested in. That way, they don’t have to waste time searching for what they want and can quickly identify the item that interests them.
Benefits of a Drop-Down Menu
For Storeowners, the drop-down menu can be a blessing. Not only is it aesthetically pleasing, but it can also make it easier for customers to navigate their way around your website. Customers are likely to leave a website unless it’s easy and user-friendly. With the drop-down menu, customers can find exactly what they need quickly and spend less time searching for what interests them. Adding a drop-down menu also serves the purpose of increasing customer engagement which ultimately increases with sales with a decrease in the bounce rate.
How to Add a Drop-Down Menu in Shopify?
Creating a drop-down menu in Shopify is a fairly straightforward process, whether you add the feature to your template or create a custom menu. To get you started, familiarize yourself with the menus and navigation options in the Shopify dashboard. After that, you can create custom menus to use or edit an existing one to fit your store’s theme and your customer’s experience.
- Log in to your Shopify account dashboard and navigate to the Themes tab.
- Select Actions and then select Edit HTML/CSS.
- Head to the Templates folder and select the theme.liquid file.
- Find the snippet of HTML code which creates the menu on your website.
- Enhance the code and save the file.
- Click “Save” to create the new drop-down menu.
Creating Your Custom Menu
To create a custom menu, you can navigate to the main menu and make changes there or create a separate drop-down menu which will appear on your website. To create that separate menu at the top level, you just need to:
- Head to the main menu in the Shopify dashboard
- Click the button for adding a collection
- Add the collection name
- Add your products to the collection
- Save the collection and set it as the main menu
Adding Submenus and Linking to Other Pages
You can also add submenus and link them from other pages on your website. To do this, you need to add the relevant code to the ‘theme.liquid’ file. The basic structure for adding submenus is as follows:
- Add a parent menu item
- Create a new div block with a class in the parent menu item
- Add a submenu link to the div block
- Repeat the steps for each submenu item
Conclusion
When you’re ready to add a drop-down menu to your website, there’s no need to be overwhelmed. Shopify makes the process simple, allowing you to customize the menu to your particular store’s needs. With a few simple steps and some HTML coding, you can have a stunning drop-down menu on your website that your customers will love.
Post a Comment for "How To Add Drop Down Menu In Shopify"